Export Data From Your Accounting Package
Use the instructions below to export a list of your clients and suppliers. These can then be uploaded into Dashnetics using the bulk import tool.
Do not include credit card details
Please ensure that you do not include client credit card details when exporting from your application. You can either deselect these columns when exporting, or open the file and delete the columns after exporting.
Export clients and suppliers from your system
Click on the following headings to view the relevant export instructions for your accounting system or application:
 Xero#
Xero#
Xero#
Click here to see the Xero support page for instructions.
To export customer contacts from Xero, refer to the Xero instructions above. Please note the steps below.
- Sign into Xero.
- Click Contacts > Customers.
- Ensure the Customers tab is selected and click Export. A file called 'Contacts.csv' is downloaded.
- Rename the file to Customers.csv.
- Repeat this process for suppliers, but in Step 2, select Contacts > Suppliers.
- If you have any contractors, you can export those too, by selecting Contacts > Contractors.
Identify your contacts as 'Client' or 'Supplier' etc
It is a good idea to add a column called 'type' and specify 'Client' or 'Supplier' etc and use it to identify each contact as either a Client or a Supplier etc. This will ensure that we import your contacts correctly into Dashnetics; if no distinction is made, all your contacts will be imported as Companies.

 MYOB Account Right#
MYOB Account Right#
Click here to see the MYOB support page for full instructions.
Be sure to also:
- export both 'customer cards' and 'supplier cards'. The file names should be CUST.TXT and SUPPLIERS.TXT respectively.
- select the following formatting options: separate data using Tabs, and select Include field headers in file.
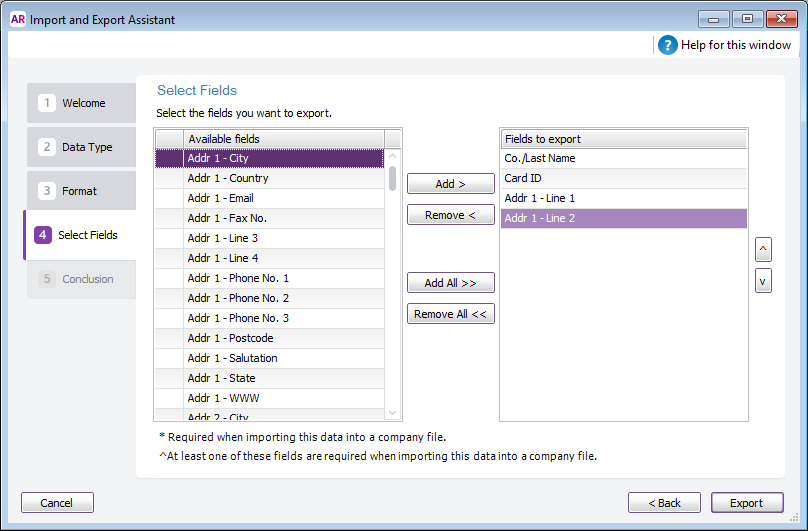
- When MYOB asks which fields to export, click Add All.
If you have data that you don't want to import (e.g. if you've used the address field to record notes about a client), please call Customer Service.
Looking for MYOB Essentials?
MYOB Essentials does not allow exporting of contacts refer here. Please call Customer Service for assistance.
 Reckon Accounts or Hosted#
Reckon Accounts or Hosted##
To export all customer contacts from Reckon Accounts or Reckon Hosted, follow these steps:
1. In the top menu, click Reports > Customers & Receivables > Customer Contact List.
2. Click Modify Report.

3. Select ALL options.
A quick way to select all options is to hold the down arrow and the space bar on your keyboard until all unchecked items are checked.
4. Click OK.
5. Click Hide Header > Export.

6. If you have Microsoft Excel installed, click a new Excel workbook. If you don't have Excel, click a comma separated values (.csv) file.
7. Click Export. Excel, or a text editor, opens and displays the report.
8. Save the file in a location that you will remember.
Repeat this process to export your suppliers list, but in Step 1, select Suppliers & Payables.

 Quickbooks Online#
Quickbooks Online#Use the following to learn how to export customer information from QuickBooks Online to Excel.
Export customer data to Excel#
There are two ways to export your customer information to Excel.
The first is from the Customers page, and the other is from the Reports page.
Each method will result in a different result, and will affect the information you can export to Excel.
Export customer data from the Customers page#
If you export from the Customer page, you'll be able to export information like Name, Company, Address, Phone number, Email Address, Customer type, Attachment, Currency, Balance, and Notes.
From the left menu, select Sales, then Customers.
Select the Export icon next to the Print icon.
Choose Export to Excel.
Export customer data from the Reports page#
If you export from the Reports page, you can customise the customer information you want to export to Excel.
This is more advantageous if you're looking for something more specific or want the capability to customise information.
From the left menu, select Reports.
Go to Sales and Customers section.
Select Customer Contact List.
Note: You can modify this report by selecting the three vertical dots (?) icon, then Customise.
Under Rows/Columns drop-down, select Change columns.
Add your desired columns, then select Run report. (Optional)
If you have plans to run this exact same report some other time, select Save customisation at the upper right.
Select the Export icon next to the Print icon, then choose Export to Excel.
Click here to see the QuickBooks support page for instructions..
Data from Other Sources#
#
If you need to export client and supplier data from another source, export your data as a .CSV or .XLS file from that application.
If your data is complex, feel free to send it to us .
We recommend that you only include active clients and suppliers. This will ensure users have current client and supplier information from the start.
What information do I need to export?
ANY client and supplier fields you currently utilise can be imported into Dashnetics.
Add records using current fields#
Any headings in your file must match the field name you already have in Dashnetics so as not to add a new field.
E.g. Your file may have 'given name' and Dashnetics has 'first name', change the first csv heading (first row) to 'first name'
Add records AND new fields into Dashnetics#
Any headings in your file that do not match a field name you already have in Dashnetics will create a new field.
E.g. Your file may have 'given name' and Dashnetics has 'first name'
Minimum Information you will need#
| Field | Definition |
|---|---|
| Company ID | If you don't already have one from an export, then number your csv records. Making sure not to match your exisiting dashentics id numbers. This will be used for company records and to link contact records to a company |
| Company Name | Name for the Company /Client / Supplier / or other group. *This is a required field for Dashnetics Companies |
| Contact ID | If you don't already have one from an export, then number your csv records. Making sure not to match your exisiting dashentics id numbers |
| Contact First Name | First name of your contact person at that business. *This is a required field for Dashnetics Contacts |
| Contact Last Name | Last name of your contact person at that business. *This is a required field for Dashnetics Contacts |
What's next?
Once you have your file, take a look at our import contacts instructions here. Alternatively you can also send the file to us.