Creating a Menu
We already know how to add different elements on our webpage. It's the right time to introduce the usage of Dashnetics Menus.
One can create their own menus with multiple menu items in no time when using Dashnetics.
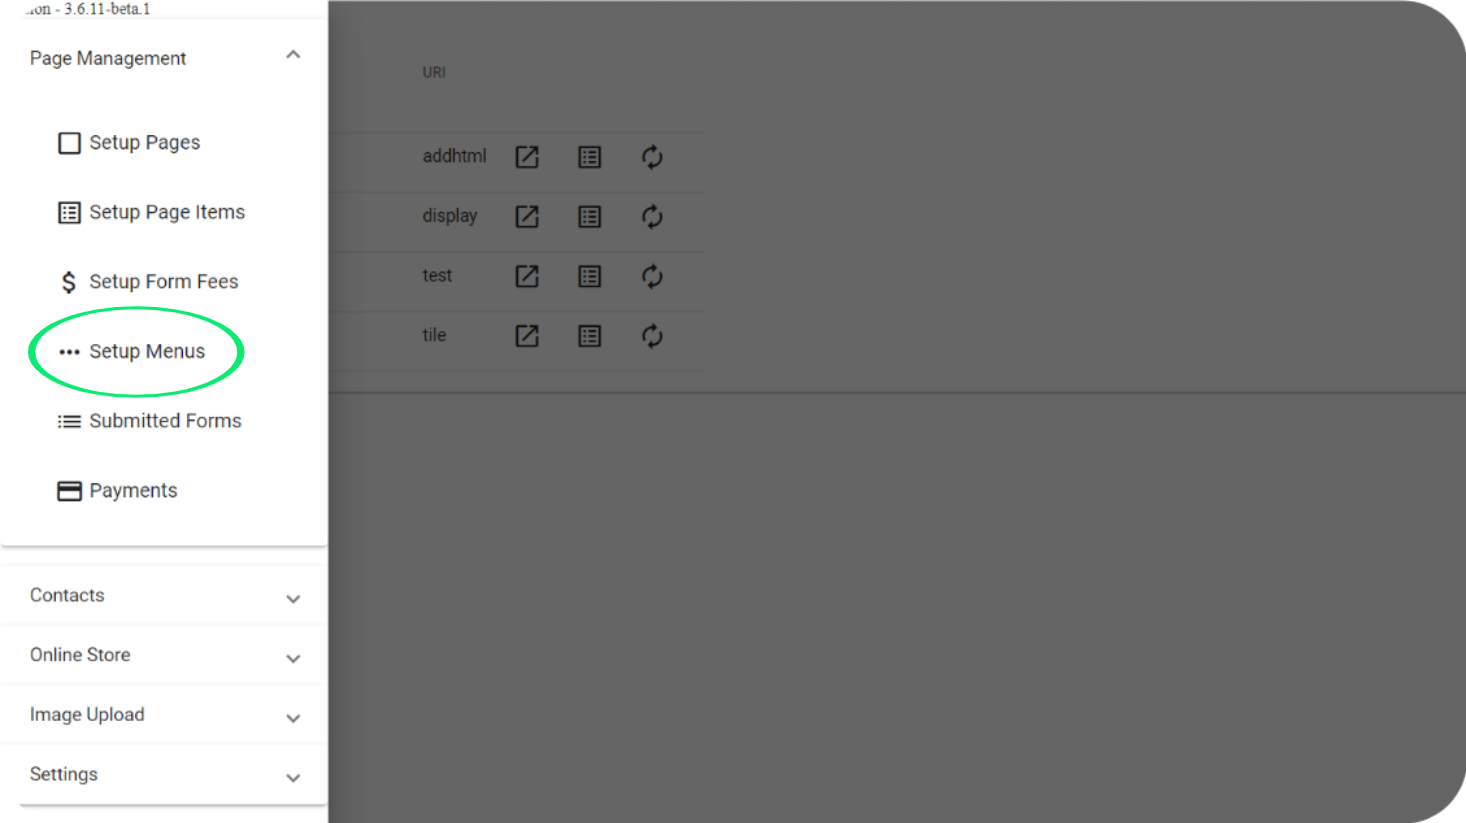
- Go to the Admin Module
- Select the Admin Module Menu
- Select 'Page Management'
- Select 'Setup Menus'
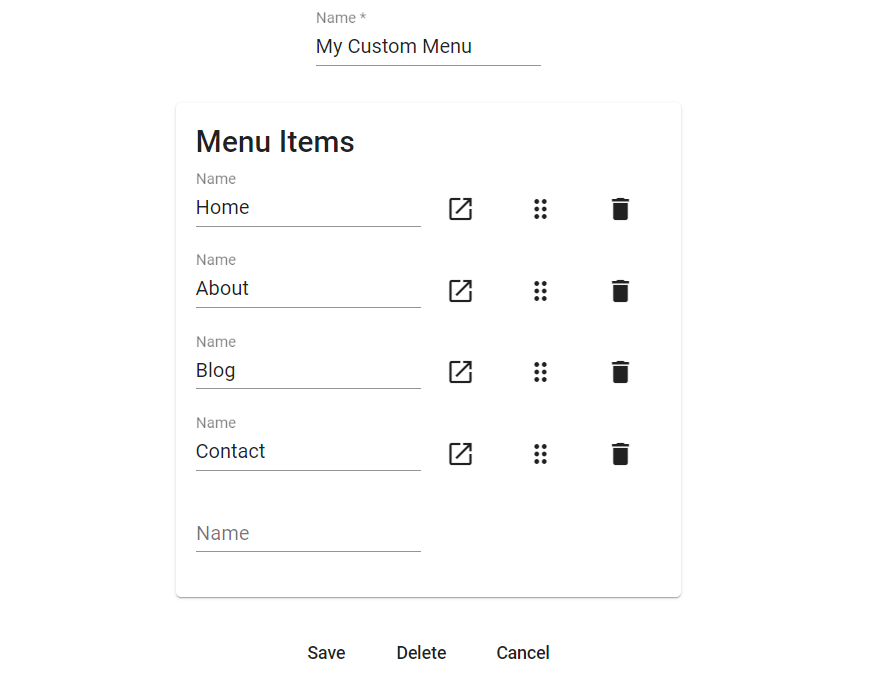
- Now click on 'Add' button to create a new menu for your website
- Give your menu a name and add as many menu items as you want
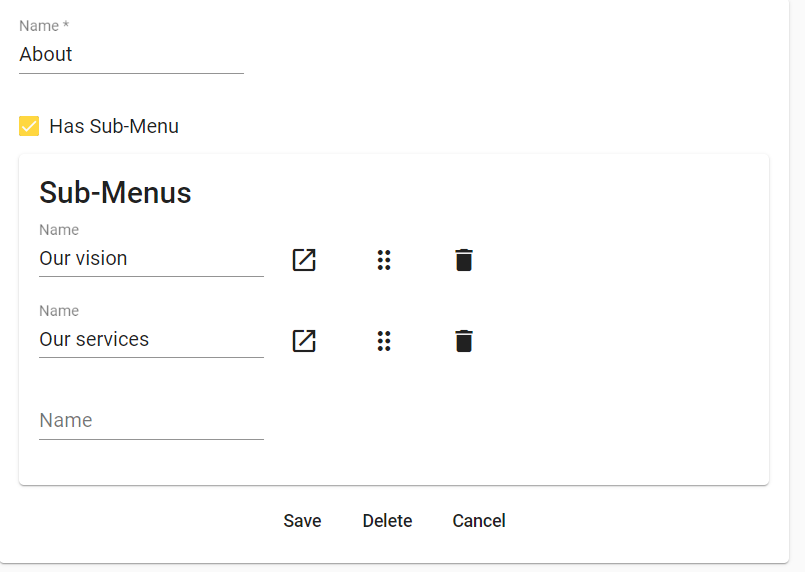
- You can also add sub menus for a menu item by simply clicking the icon next to the menu item
- From there, you can add sub menu items as shown
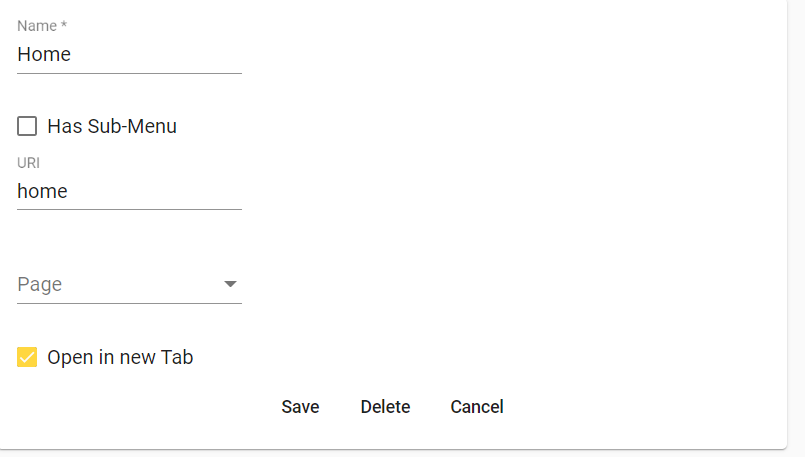
- In a similar way, you can also add URIs or redirect the users to a page when they click on the menu item
- With all this in place, we now have a menu setup on our admin panel but we still need to add it to a webpage and style it.
Let's do that next !