Adding Headings
Prerequisites: a Page
Various elements can be added to any page. There are two types of elements:
- Items - includes text, images, widgets, display areas as well as inputs and fields for data entry.
- Actions - these help provide navigation, sending emails, saving data and more.
We will start by adding a heading to our page.
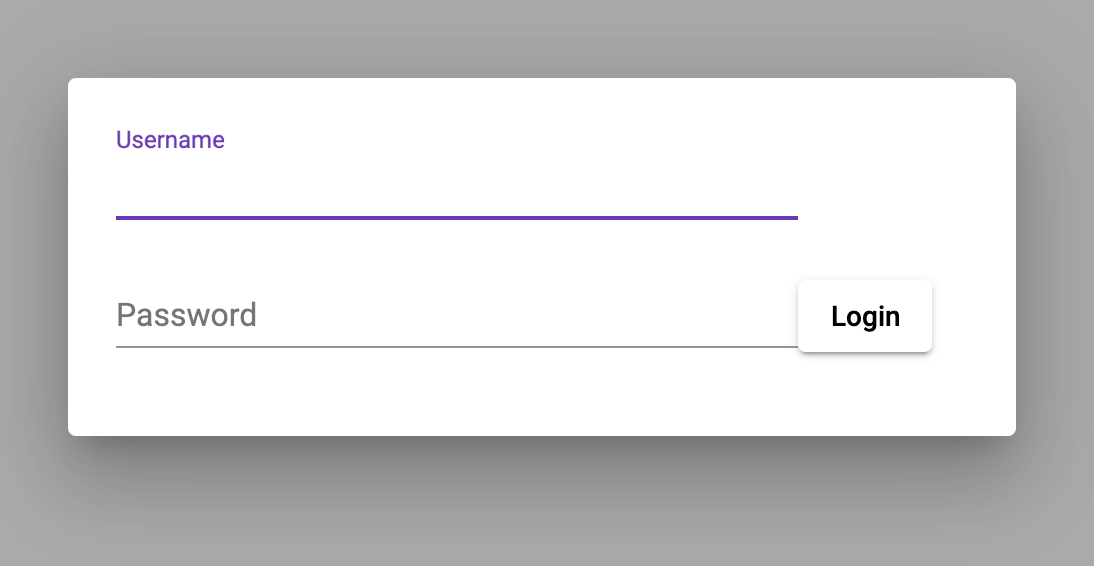
1. Log into your Admin Module
To access your admin site, simply type "admin." before your public url.
eg: https://admin.demo.dashnetics.com.au
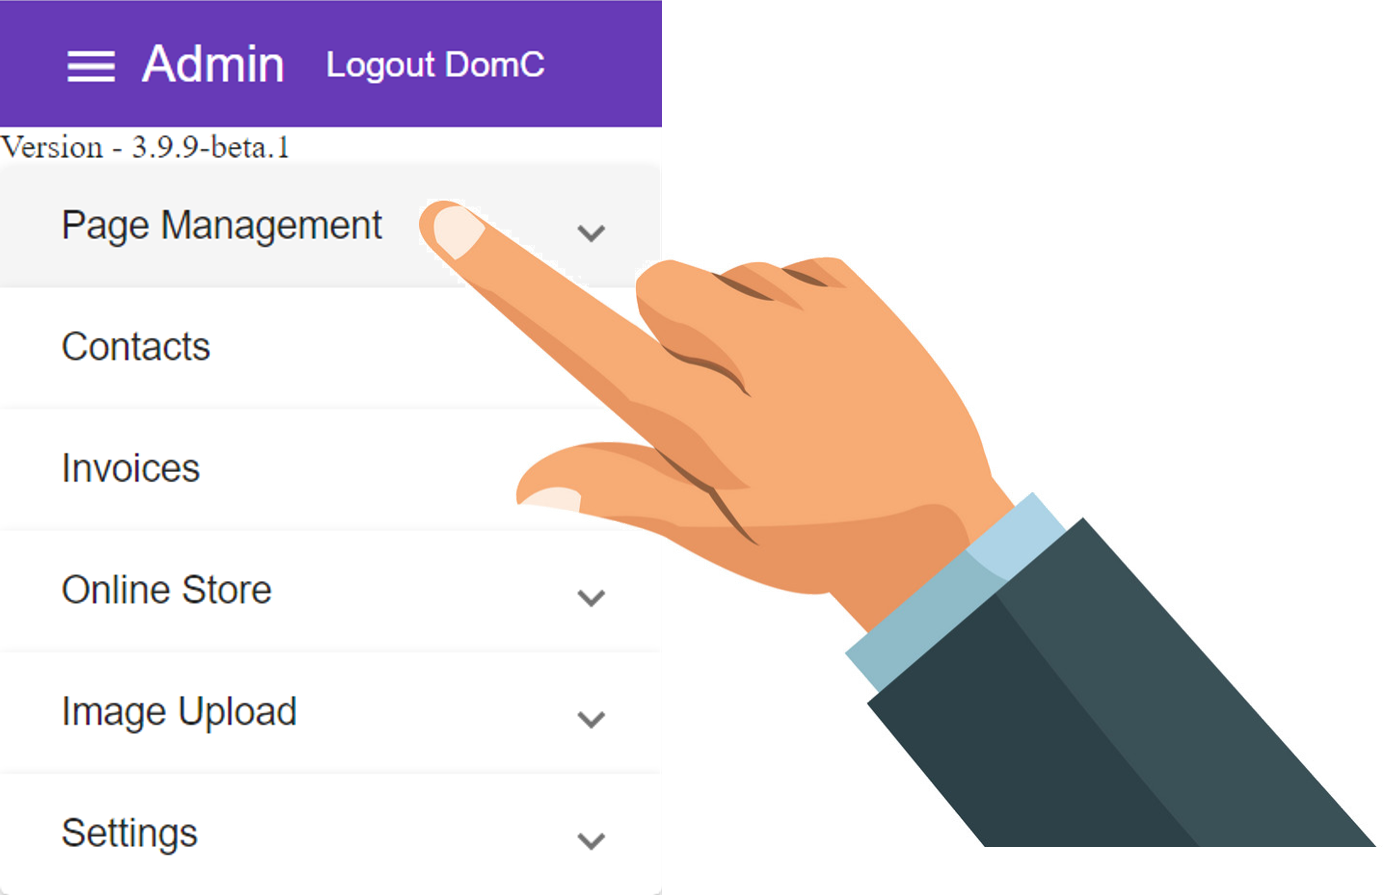
2. Select the

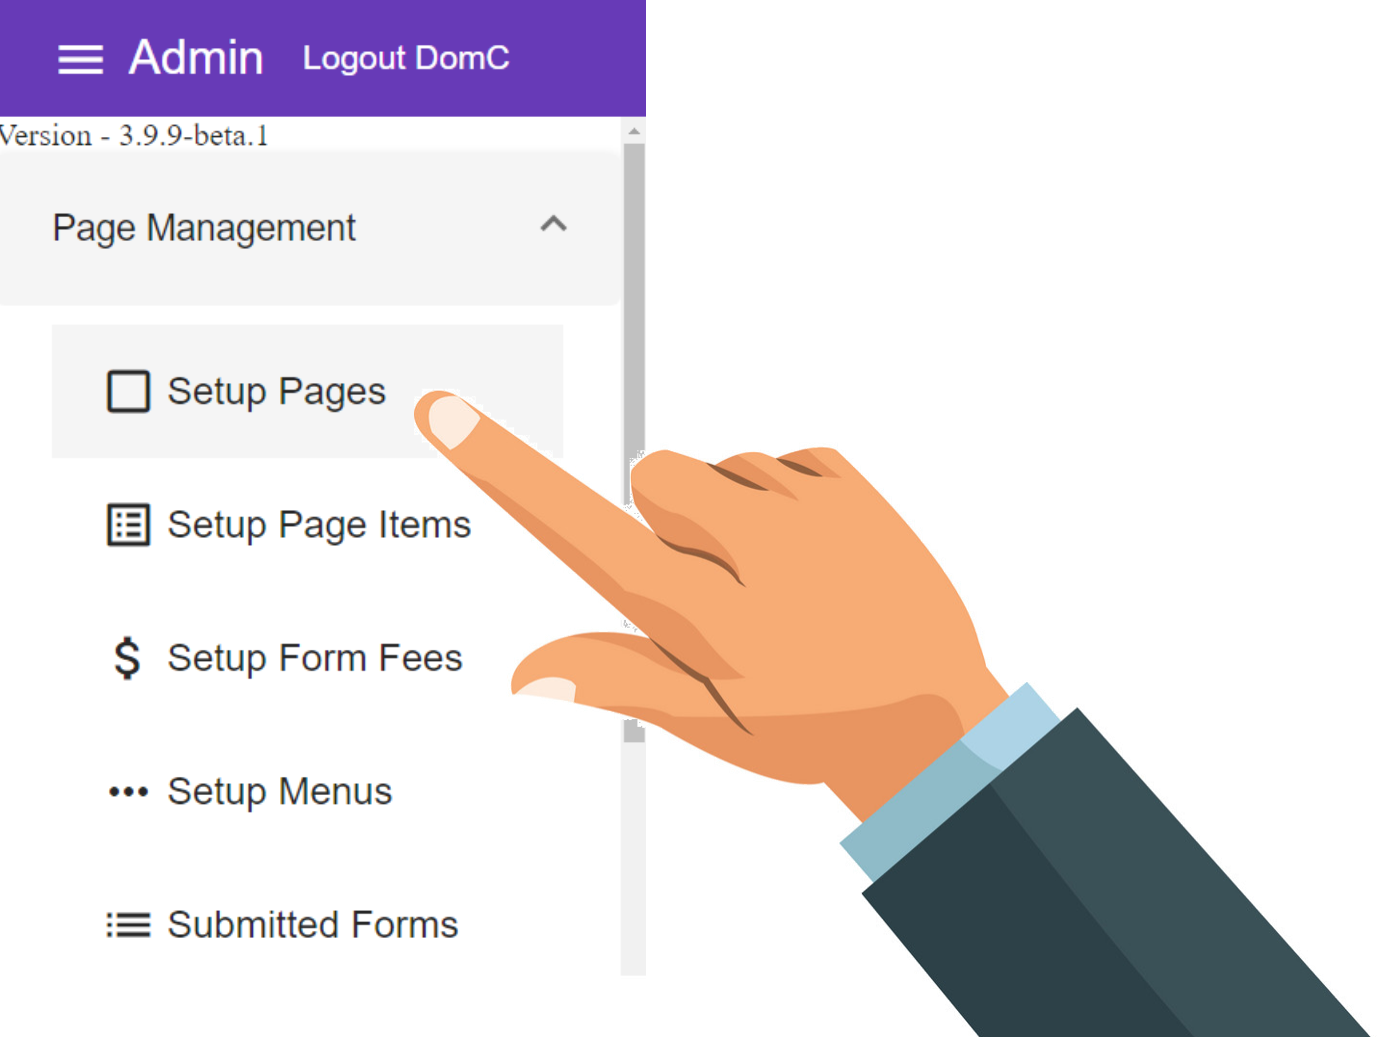
3. Select
4. Select
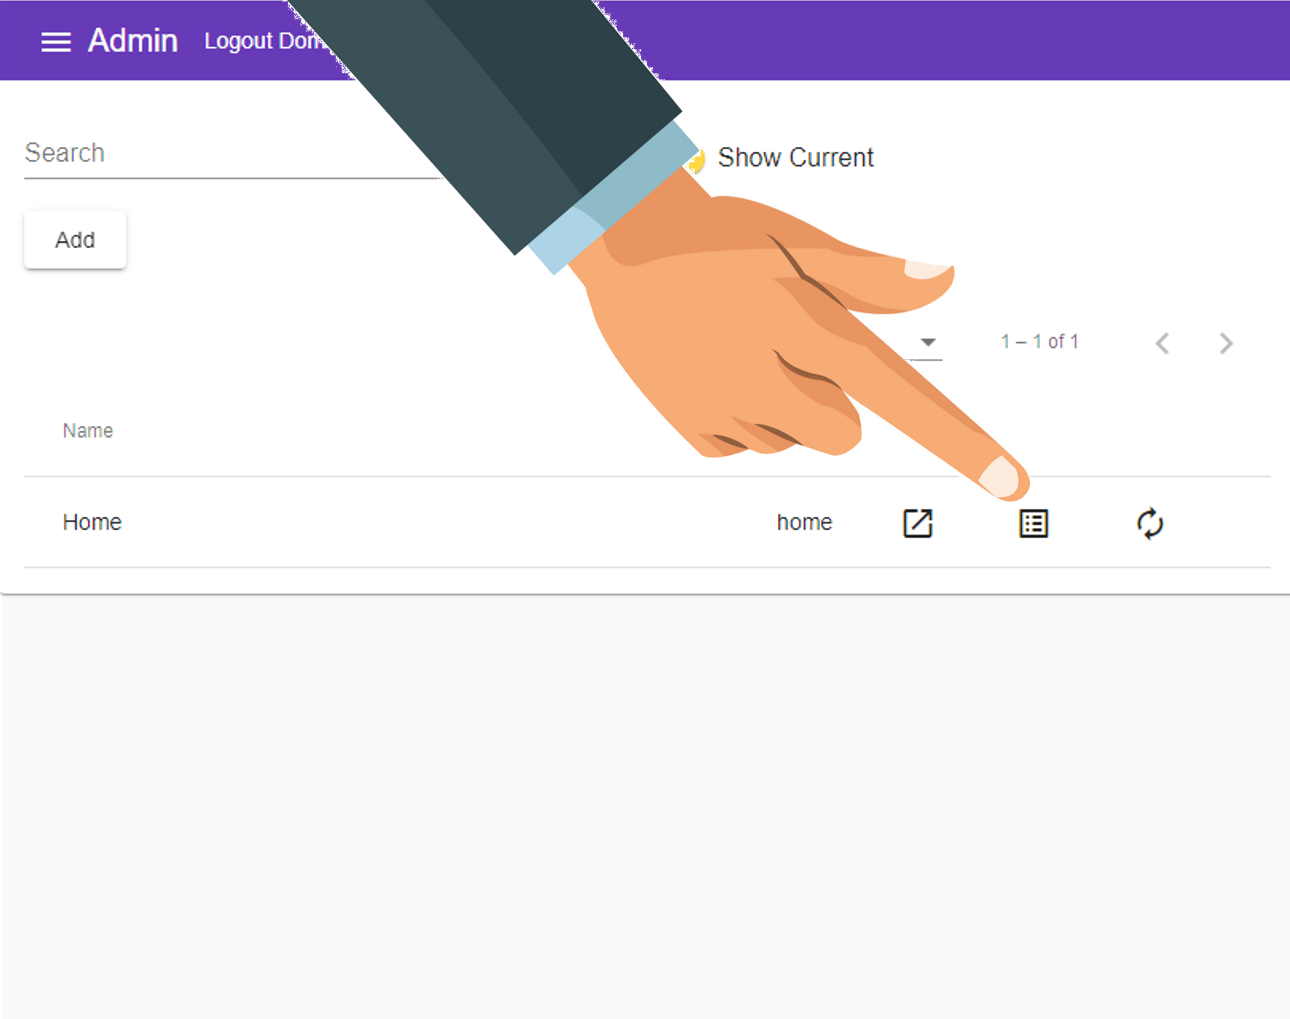
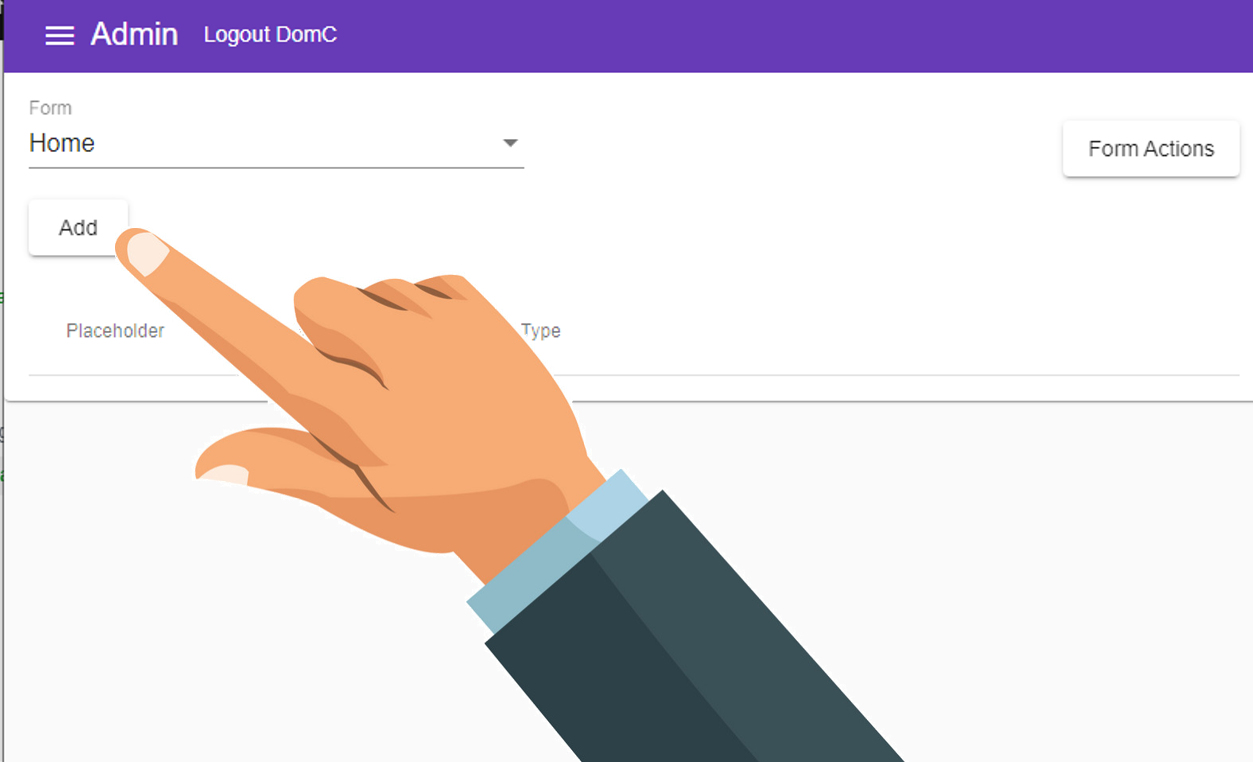
5. Select Items Icon
Each page will be listed, choose the "Items" Icon next to the page you want to change.
6. Select
To begin adding a new Item to the page
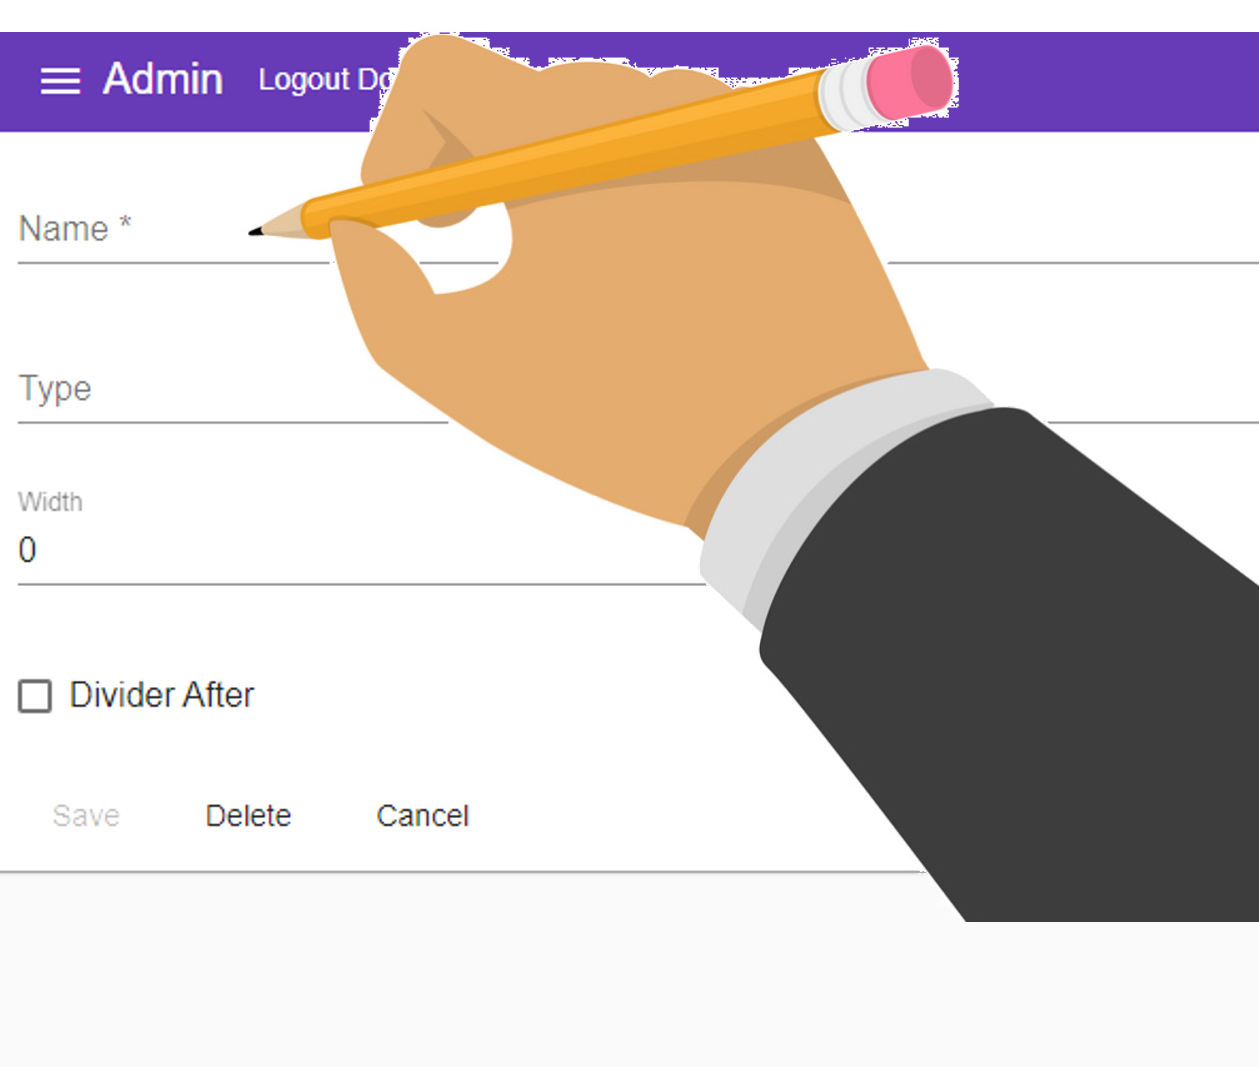
7. Enter a Name for your Heading / Item
- For example, "Main Heading"
Names can contain spaces or any characters
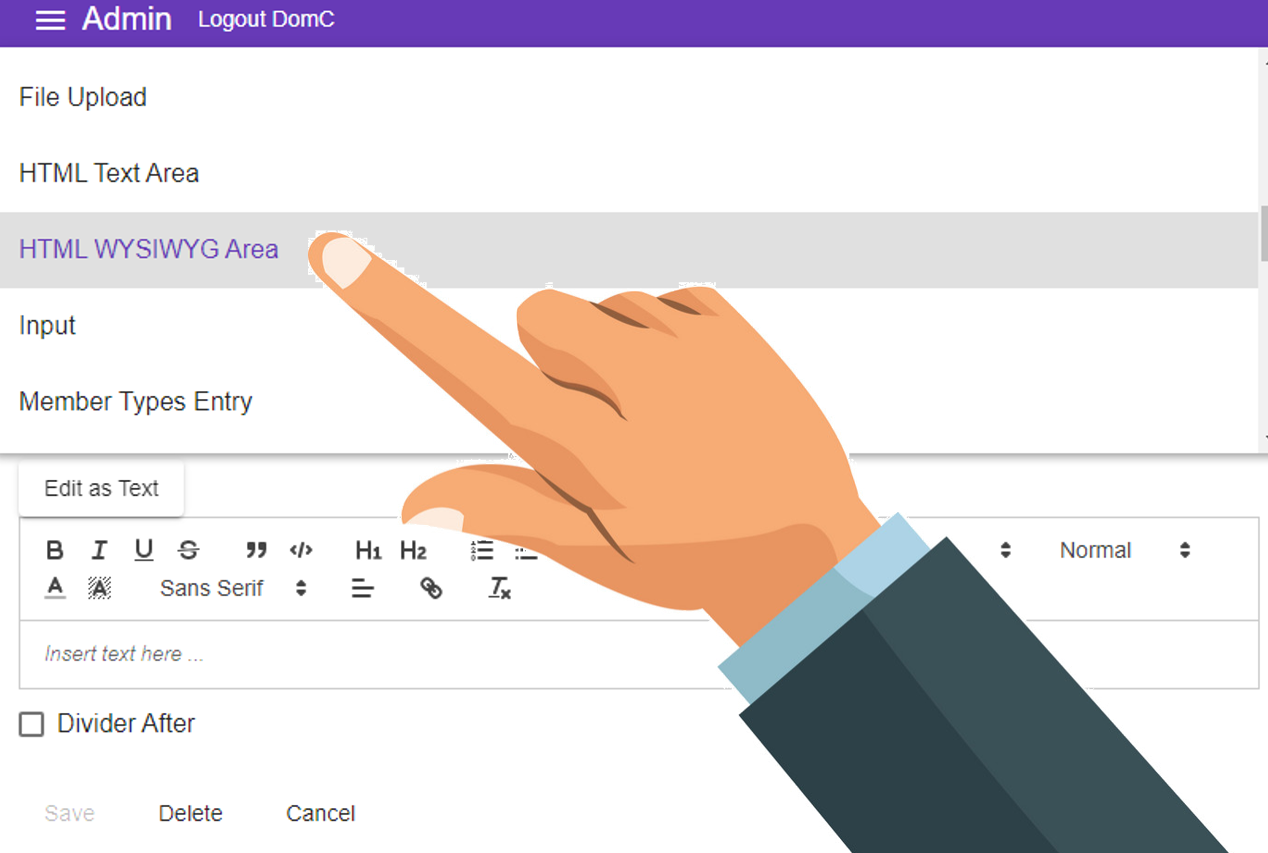
8. In the Type dropdown, choose "HTML WYSIWYG Area"
9. Width can remain as "0"
Width "0" means the item will display at the DEFAULT width.This can be changed later if necessary
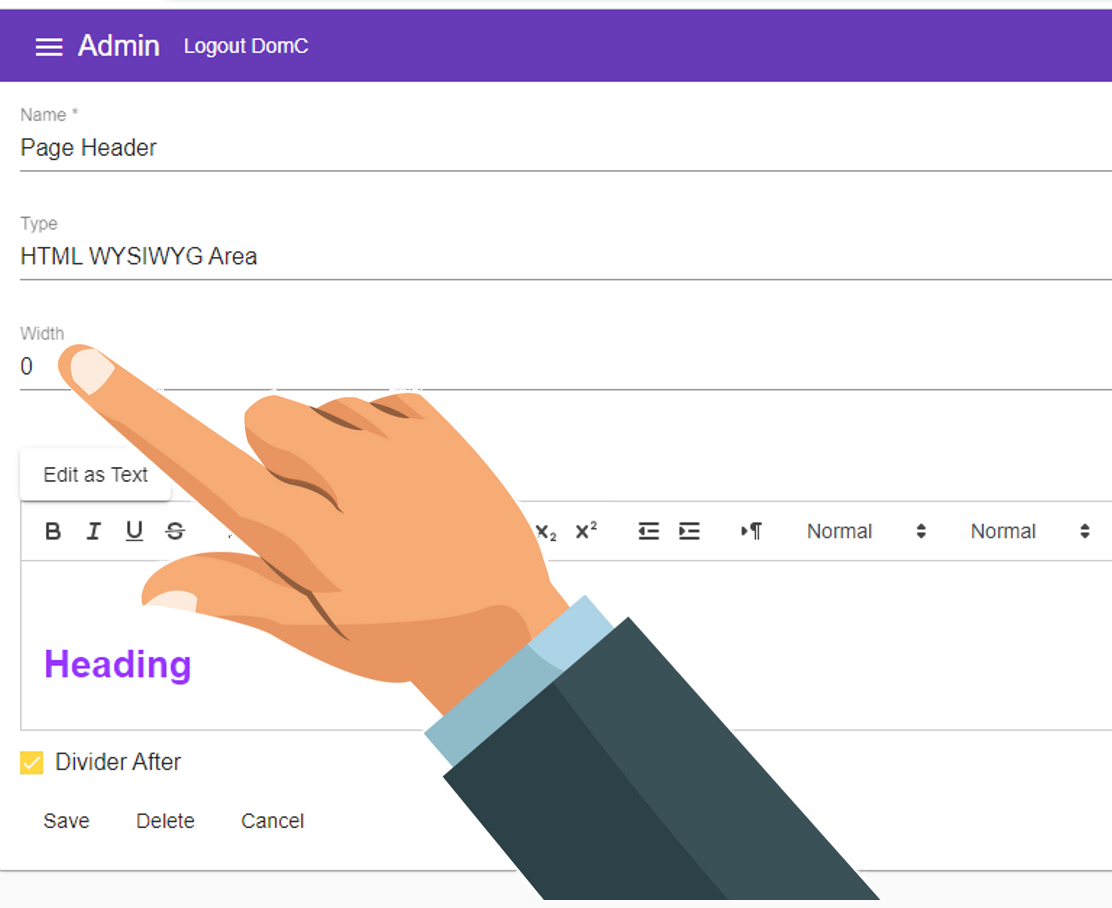
10. Within the WYSIWYG area type your heading text
For example, "My First Form"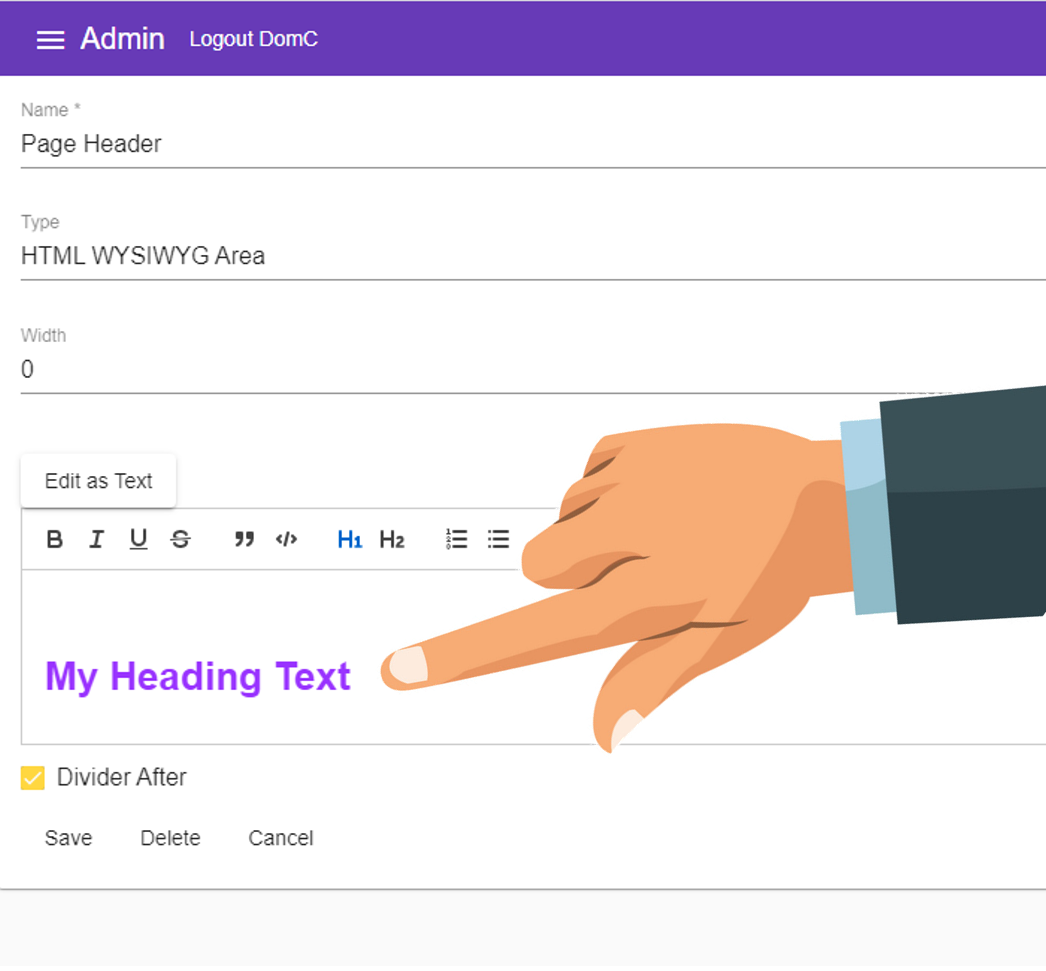
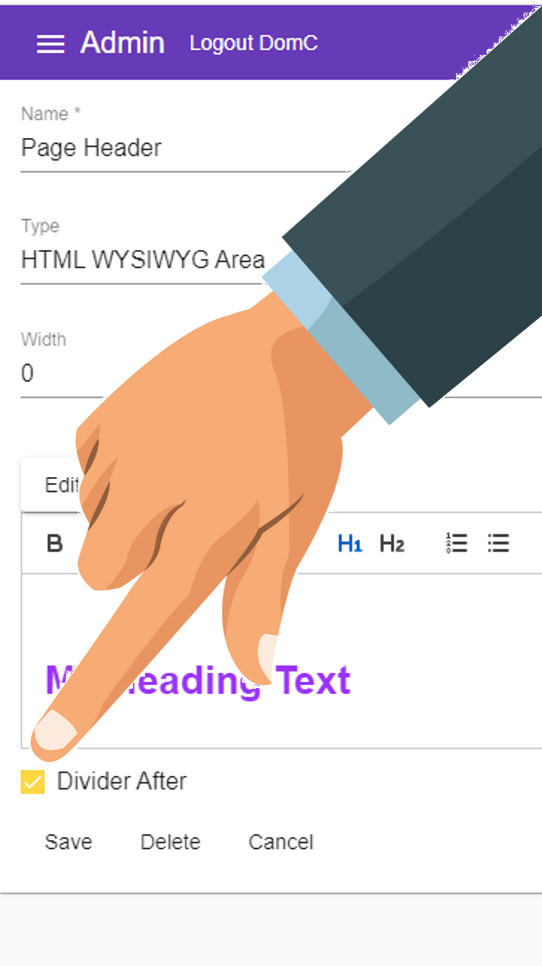
11. Tick check_box 'Divider After'
This will ensure the next element we add will appear below the heading.
12. Press
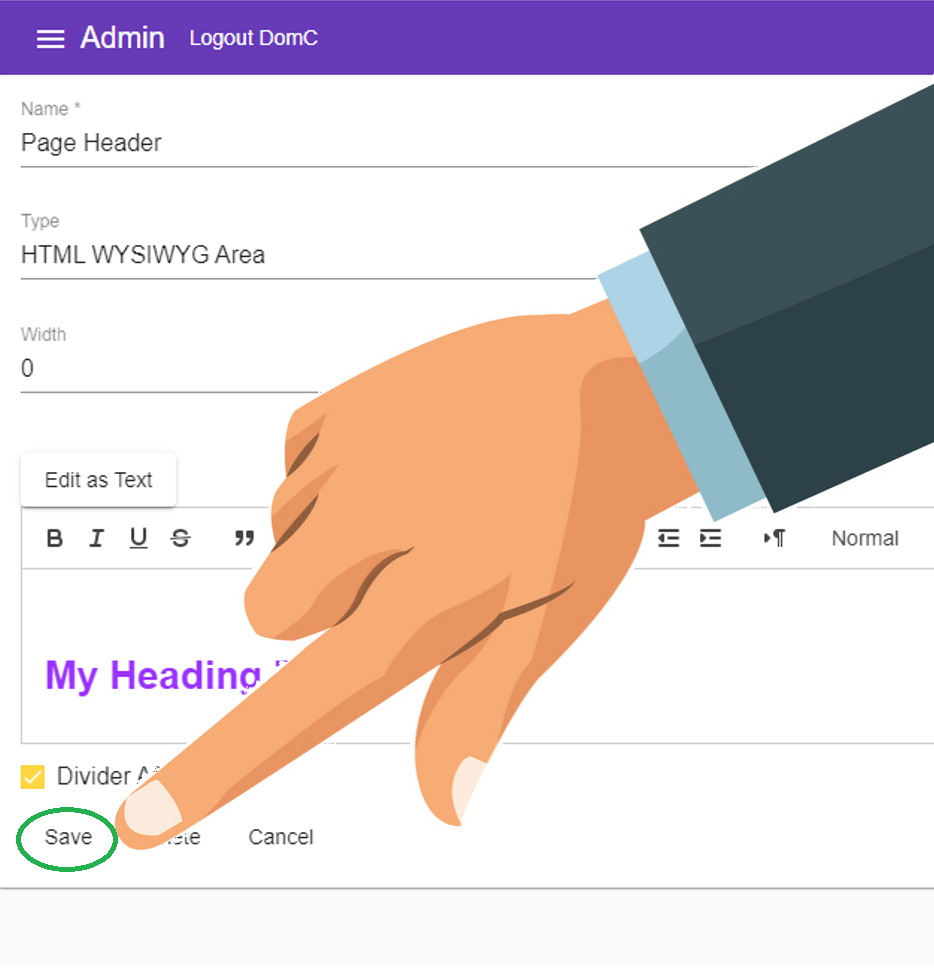
Our page should now look something like this.